Food photography


Food photography is a still life photography genre used to create attractive still life photographs of food. It is a specialization of commercial photography, the products of which are used in advertisements, magazines, packaging, menus or cookbooks. Professional food photography is a collaborative effort, usually involving an art director, a photographer, a food stylist, a prop stylist and their assistants.[1]
In advertising, food photography is often – and sometimes controversially – used to exaggerate the attractiveness or size of the advertised food, notably fast food.[2][3]
Changing trends
For a long time, food photographs tended to be shot and composed in a manner similar to the way people were used to encountering their food: laid out on a table setting and shot from an overhead perspective, i.e., from the point of view of the eater.[4] Stylists accordingly arranged the food to appear good from above, with the items arranged flat on the plate and clearly separated from each other.[5]

Later, romantic lighting, shallower angles and more props came en vogue,[4] with extreme cases leading to the term "food porn". Most recently, the prevailing trend in Western commercial food photography is to present the food as simple, clean and naturally as possible and with little props, often using effects such as selective focus, tilted plates, and extreme close-ups.[4] This complements trends in professional cooking to make the food more visually interesting. For instance, the height of dishes tends to increase and their elements are often layered, which lends itself well to narrow-angled shots.[5]
Food stylist

The role of the food stylist is to make the food look attractive in the finished photograph. The time and effort a stylist takes to carefully and artfully arrange the food, is the cause of differences between the way the stylist presents it and the way a home cook or chef may. Visual know-how is also a requirement, as is the knowledge of how to translate the perception of taste, aroma and appeal that one gets from an actual dish, to a two-dimensional photograph.
Food stylists have culinary training; some are professional chefs or have a background in home economics.[6] In addition to knowledge of nutrition and cooking techniques, food stylists must also be resourceful shoppers.[6] As creative professionals they envision the finished photograph and style the food accordingly.
Setup
The process of food photography begins with the purchase of the food and ingredients. Only the most visually perfect foodstuffs are acceptable and multiple backup or test items are usually needed. As a result, purchase of the food and ingredients is a very time-consuming process.[7] The best-looking of the purchased items is selected and marked as the "hero", i.e., the item that will be featured in the photograph.[8] During the setup and for test shoots, it is represented by a cardboard stand-in.[9]
The actual photography can take place in a studio under controlled lighting conditions, or under natural light.[10] The light, background and setting is carefully prepared so as to present the food in an as attractive way as possible without distracting from it. The color and texture of the background is selected so as to effectively complement that of the food and to assist with its lighting.[11]
Styled food is usually marked as inedible and discarded after the shoot, because it may have been handled or treated in ways that make it unsafe for consumption.[12]
Styling techniques
In addition to choosing, preparing and composing plated food, stylists use numerous techniques to make it appear as attractive as possible. These may include:
- creating steam with cool air nebulizers or a combination of chemicals that give off smoke with the appearance of steam;
- spraying food with water or mixtures of water, corn syrup, or other liquids to keep it looking fresh;
- making a mixture of solid shortening, corn syrup and powdered sugar (essentially a very stiff frosting) that can be scooped to simulate real ice cream;
- using a variety of browning agents (usually mixtures used to brown gravies or sometimes heat activated liquids used in commercial bakeries) to enhance the color/brownness of cooked meats and poultry;
- using heavy cream or even white glue instead of milk in bowls of cereal to prevent flakes from becoming soggy too quickly.
- blanching green vegetables to just bring up their bright color, rather than cooking them completely. Other vegetables and foods may be cooked just to color, so they do not brown or become wrinkled if they must stand under the camera for a while.
- adding water to beverages so light will filter through better and add sparkle to the drink.
- lifting sunken vegetables in soup.
Cold beverages

To create the effect of a thin layer of condensation forming on the outside of glasses containing cold liquid, dulling spray may be applied,[13] with paper or masking tape protecting the non-"frosted" areas. More pronounced condensation and dew drops are imitated by spraying the glass with corn syrup or glycerin.[14]
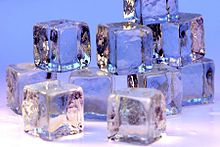
Ice cubes used in shoots are made of acrylic, so they do not move or melt during the shoot, which may take place under hot studio lighting.[15] Fresh-looking bubbles on the surface of drinks are created by applying a mixture of the drink and detergent to the surface with an eyedropper.[16] White glue may be used in lieu of milk,[13] and a mixture of brewed coffee and water instead of tea.[17]
Salads
Salads in food photography are composed with a view to creating appealing textures, shapes and colors. To improve support and aid in composition, salad in a bowl is built around a smaller bowl placed upside down in the outer bowl.[18] Salad greens are kept fresh and crisp by misting them with cold water prior to composition.[19] Salad dressing is not normally used, as it makes the salad slippery and difficult to style, but the appearance of dressing may be created by sprinkling herbs and spices over the wet salad, or mixing them in oil and applying it with a brush.[20]
Fruit salads are particularly challenging to shoot because of the short time the fruit pieces, which are cut immediately prior to final photography, retain their appearance.[21] As only the outer layer of the salad is of interest, the concealed interior of the salad bowl may be filled by mashed potatoes or another mixture.[22] Thick or heavy dressings do not photograph well; they are usually thinned and applied by brush.[23]
Hamburgers and sandwiches

Hamburger photography is challenging because the buns dent easily and an assembled burger is quick to lose its visual appeal.[24] When assembling the burger, the ingredients are held in place with toothpicks and the meaty interior of tomato slices is removed to avoid juice discoloring the ingredients.[25] The meat patties are superficially cooked, the edges browned with a torch and the meat made to look more appetizing with a colorant.[26] The edges of melted cheese slices may be brushed with household cleaner to make them look freshly melted longer.[27] Condiments such as mayonnaise are applied to the edges with an applicator bottle.[28] Steam is normally used to suggest the burger is hot.
Sandwiches are assembled using similar techniques. Wet paper towels are used to prevent the bread from drying out. If a half sandwich is to be depicted, the bread and the components are individually sliced with scissors and assembled in place.[29]
See also
Notes
- ^ Manna/Moss, Chapter 4.
- ^ Bhasin, Kim (10 January 2012). "Look At The Shocking Difference Between Fast Food Ads And Real Menu Items". businessinsider.com. Retrieved 16 April 2013.
- ^ D., Dario. "Ads vs. Reality – Fast Food". alphaila.com. Retrieved 16 April 2013.
- ^ a b c Manna/Moss, Introduction.
- ^ a b Manna/Boss, Chapter 4, section "Food-Styling Trends".
- ^ a b Manna/Boss, Chapter 4, section "What Is a Food Stylist?".
- ^ Bellingham/Bybee, 6.
- ^ Bellingham/Bybee, 8.
- ^ Bellingham/Bybee, 4.
- ^ Yi Chen (11 May 2010). "10 Food Photography Tips to Make It Look Tasty". photoble.com. Retrieved 16 April 2013.
- ^ Bellingham/Bybee, 18.
- ^ Bellingham/Bybee, 3 and 11.
- ^ a b Bellingham/Bybee, 29.
- ^ Bellingham/Bybee, 33.
- ^ Bellingham/Bybee, 36.
- ^ Bellingham/Bybee, 41.
- ^ Bellingham/Bybee, 42.
- ^ Bellingham/Bybee, 60.
- ^ Bellingham/Bybee, 61.
- ^ Bellingham/Bybee, 62.
- ^ Bellingham/Bybee, 65.
- ^ Bellingham/Bybee, 68.
- ^ Bellingham/Bybee, 69.
- ^ Bellingham/Bybee, 88.
- ^ Bellingham/Bybee, 93.
- ^ Bellingham/Bybee, 95.
- ^ Bellingham/Bybee, 98.
- ^ Bellingham/Bybee, 100.
- ^ Bellingham/Bybee, 108.
References
- Bellingham, Linda; Bybee, Jean Ann (2008). Food styling for photographers: a guide to creating your own appetizing art. Oxford: Focal Press. ISBN 978-0-240-81006-5.
- Manna, Lou; Moss, Bill (2005). Digital Food Photography. Course Technology. ISBN 1-59200-820-8.
Further reading
- McAlpine, Margaret (July 2005). Working in the Food Industry. Gareth Stevens. pp. 36–43. ISBN 978-0-8368-4776-5.
